
Learn About Project Basics
Projects are teams with most feature rich workspaces. They have an activity stream, members list, and more than 15 additional modules that can be added to suit your company’s needs.
If there’s a group of employees who often work together, share duties, or collaborate on assignments, a Project can help them do so in an organized and efficient way.
Why Projects?
Projects can help users get projects, assignments, and tasks done in less time with better visibility and communication. They can be used by both internal and external users.
Create A Project, Choose Its Settings
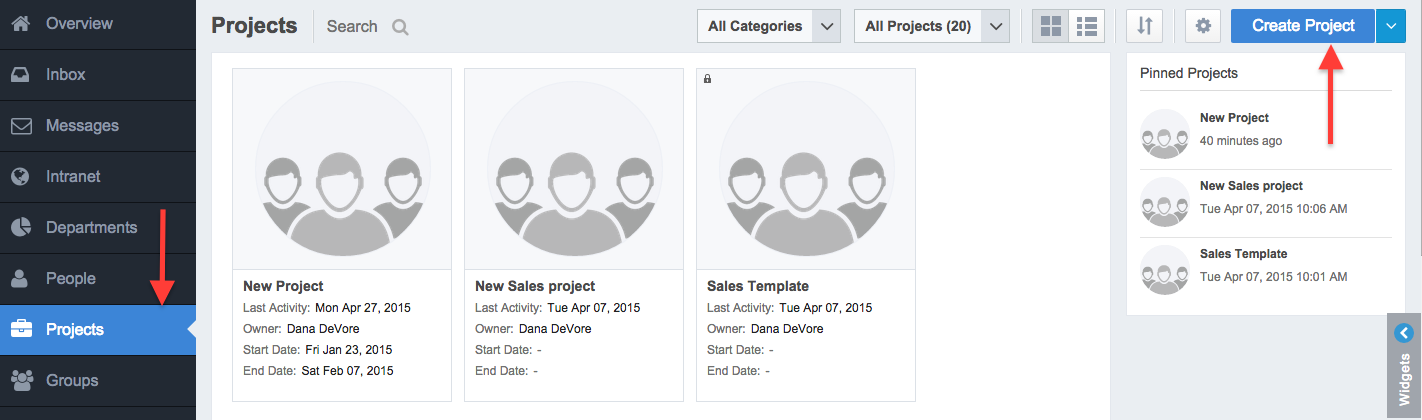
- Creating Projects in MangoApps is easy. To get started, click on the Projects tab from the left-hand navigation.
- Now you should see a Create Project box in the top right. Click on it and fill out the required information. Hit the Create button when you’re finished.
- While creating your Project, you can choose to make it Private, Public, or Unlisted. Anyone can instantly join Public Projects by simply clicking the Join button.
- Making your Project Private means all users must be invited or request access to the Project in order to participate.
- Private Projects still appear in searches and can be accessed by all users, but only members can post updates, comments, and so on.
- Making your Project Unlisted means only you and the members of the Project are able to see the Project, all other users will not be able to see the Project.
- You can also set a Start Date and Completion Date, set your Time Zone, and add tags, for easy search-ability.
Create Project From Template Options
- When creating a project from a template you now have 2 choices for copying content. The choices are:
- Content in the new project would be created by the same user who created it in the template. In this option the template creator is automatically added to the newly created project also.
- All occurrences of the template creator are replaced by “You”. In this option the template creator is not added to the newly created project (unless the project creator is same as the template creator)
- Once the project is created, the created by for the copied content can’t be changed

Add Just The Modules You Need
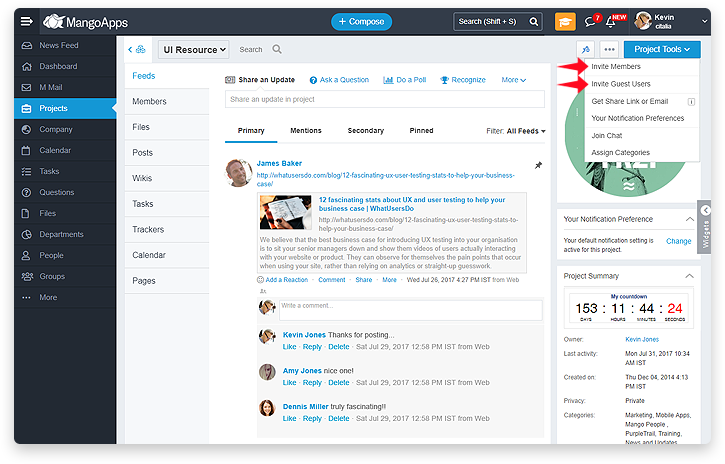
As a Project Admin, you can add your choice of modules to Projects. Click the “…” More menu in the top right of the Project and select Manage Modules. You can add and remove modules at any time and you can also change certain modules’s settings.

Invite Members Into Team
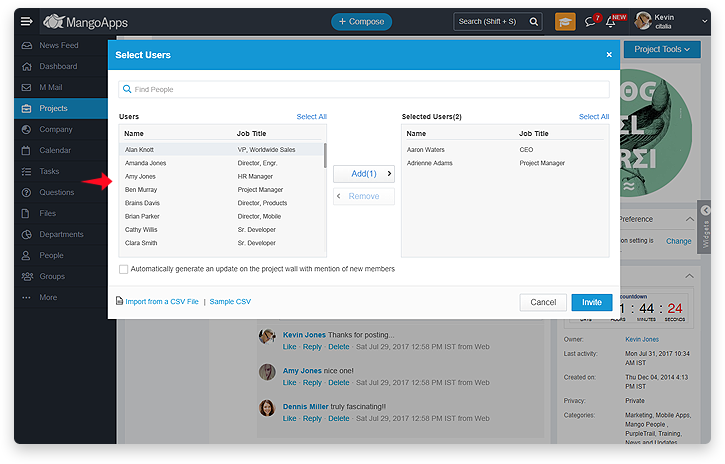
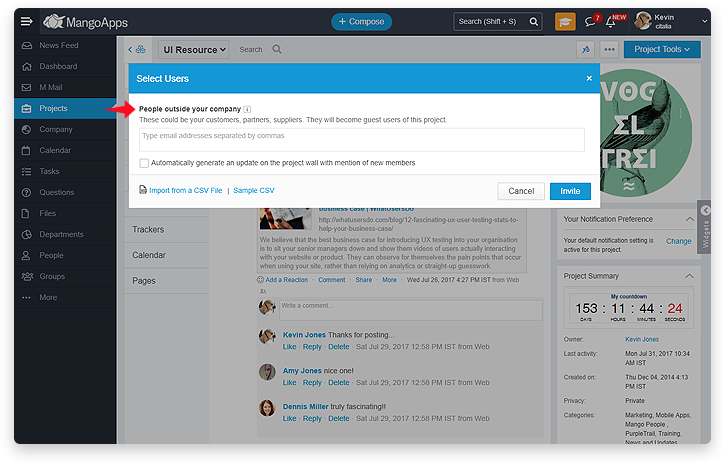
- Invite of network users & guest users in a team has been separated out
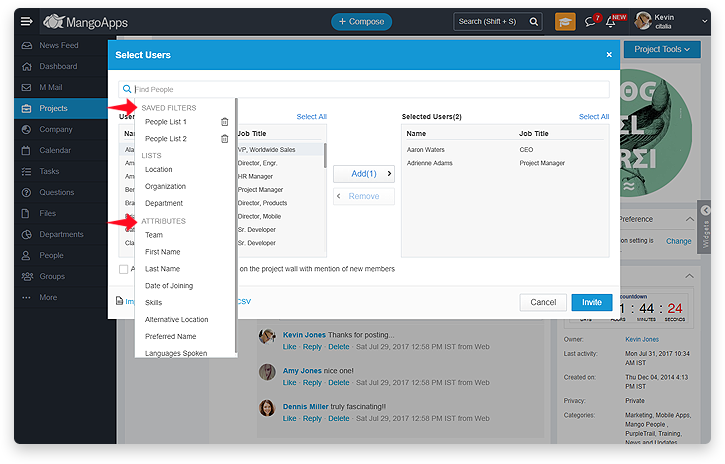
- Invite of network users you can quickly get to the member list using the new advanced search bar
- You can also upload a list of users via CSV
- Save the filtered list to re-use it again later for inviting members to other teams
Collaborate Using Updates, Posts, Wikis, Documents, & More
Take advantage of all the collaboration tools Projects have to offer. Use Posts and Updates to keep colleagues informed.
Make an update by entering text in the Update text box at the top of your Project’s Activity Stream. Create a Post by clicking on the Posts link on your left sidebar.
Create Wikis to not only share important information, instructions, or lists with colleagues, but also to allow them to add to, edit, and collaborate with you on it as well.
You can create a Wiki easily by selecting the Wikis link on your left sidebar and hitting the green Create A Wiki box.
Share Documents with Project members. Set share permissions on the Document and access older versions as newer ones are uploaded via our handy document history feature.
Attach a Document to any Update or Post. Access older versions of a file by clicking on the arrow in the upper right corner of the file and then on Go to details page from the drop down. You can access older versions of the file here in the Previous Versions section on the bottom right side of your screen.